在简单的介绍完NP的历史以及搭建,让我们先跳出NP框架,了解下其他的一些前面讲过的框架及其搭建过程。
meanTorrent是目前来看,国人新框架中功能最为齐全、开发程度较高的一个。(其他我了解的都基本在开发过程中滴说)
从官方的介绍来看:
meanTorrent - MEAN.JS BitTorrent Private Tracker - Full-Stack JavaScript Using MongoDB, Express, AngularJS, and Node.js, A BitTorrent Private Tracker CMS with Multilingual, and IRC announce support, CloudFlare support.
相比已经停止开发维护的NP框架,一个有正经团队维护的项目从好的看,出现问题能统一修复解决,但从另一方面,有点剥离站点个性化的需求——从目前项目列出来的几个站点来看,站点雷同程度有过之而无不及 。反正国人擅长建站,小站死了又是一批,能活成大站就是可以收割的时候2333)
同样考虑到更新频繁这一点,本处的搭建手记也仅做示例,具体还是请参见项目主页README的介绍。
2018.08.27 请注意meanTorrent自
v1.8停止开源维护。且该版本存在严重的信息暴露漏洞,不建议使用该框架建站。
2019.07.24 MINE站已经长时间522,而本月的18号另外一个用meanTorrent建站的中型站点PTDream+也宣布重新回到NPHP框架,实际也意味着meanTorrent框架的失败了。
依赖分析
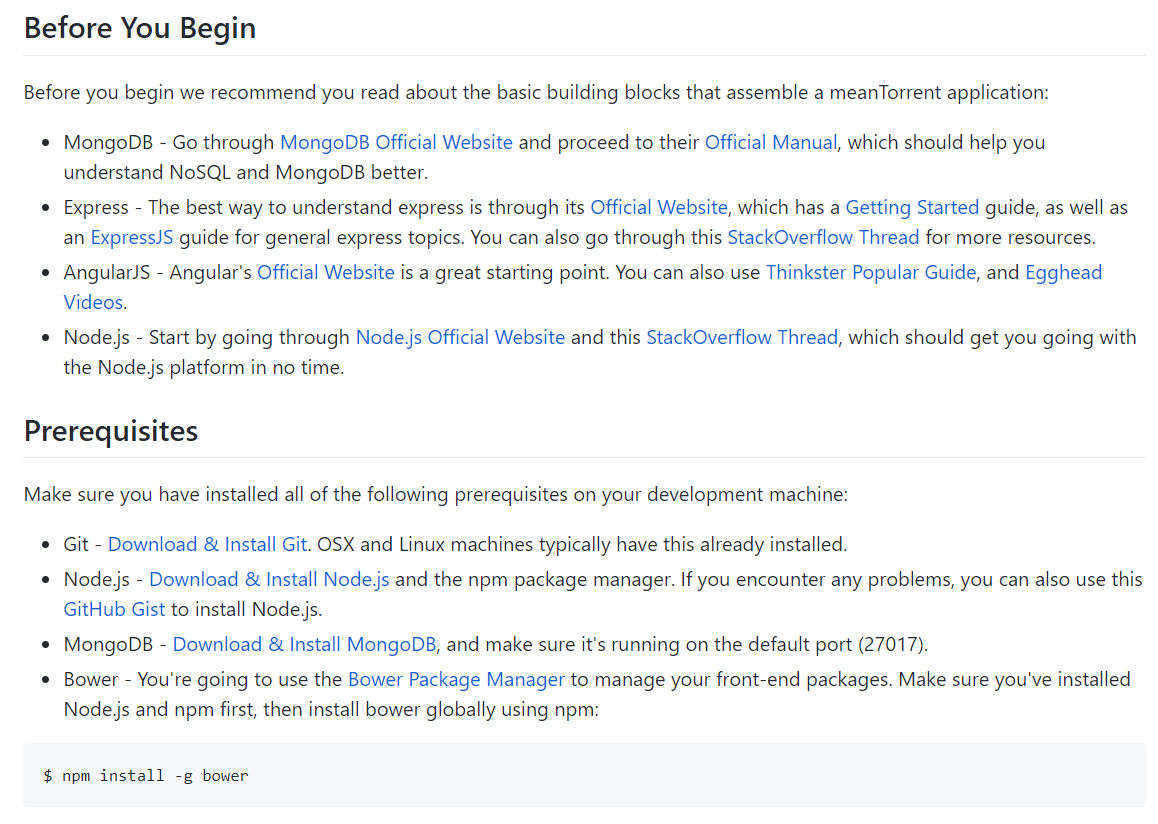
meanTorrent其所用的依赖十分基础:Git(版本管理)、Node.js(运行程序)、MongoDB(数据库) 、Bower (浏览器包管理器)。

开机及环境准备
按照本人惯例,开一台 Vultr (←这里有个很生硬的afflink) 的$5虚拟机进行搭建测试,系统为Ubuntu 16.04,地点随意。
同样,对基础依赖不大,所以全部程序直接包管理安装即可,喜欢折腾的可以通过源代码编译安装,但这里只是测试(踩坑),所以一切就简。
sudo apt-key adv --keyserver hkp://keyserver.ubuntu.com:80 --recv 9DA31620334BD75D9DCB49F368818C72E52529D4
echo "deb [ arch=amd64,arm64 ] https://repo.mongodb.org/apt/ubuntu xenial/mongodb-org/4.0 multiverse" | sudo tee /etc/apt/sources.list.d/mongodb-org-4.0.list
curl -sL https://deb.nodesource.com/setup_8.x | sudo -E bash -
sudo apt-get update && sudo apt-get upgrade
sudo apt-get install -y git nodejs mongodb-org
sudo service mongod start
然后安装npm的包管理器bower (话说现在不应该都用Webpack或者Yarn了嘛?)
npm install -g bower安装meanTorrent
建议使用非root账户进行安装!请使用adduser以及visudo创建新账户并赋予新账号超级用户权限。
首先从Github上clone一份源代码来
git clone https://github.com/taobataoma/meanTorrent.git然后使用npm安装依赖(过程中一堆WARNING都可以不用管233)
cd meanTorrent
npm install
但似乎还是有问题,报错如下。在安装node-gyp、iconv以及sharp的时候报错。
rhilip@vultr:~/meanTorrent$ npm install

> [email protected] install /root/meanTorrent/node_modules/iconv
> node-gyp rebuild

Traceback (most recent call last):
  File "/usr/lib/node_modules/npm/node_modules/node-gyp/gyp/gyp_main.py", line 13, in <module>
    import gyp
  File "/usr/lib/node_modules/npm/node_modules/node-gyp/gyp/pylib/gyp/__init__.py", line 8, in <module>
    import gyp.input
  File "/usr/lib/node_modules/npm/node_modules/node-gyp/gyp/pylib/gyp/input.py", line 5, in <module>
    from compiler.ast import Const
ImportError: No module named compiler.ast
gyp ERR! configure error
gyp ERR! stack Error: `gyp` failed with exit code: 1
gyp ERR! stack     at ChildProcess.onCpExit (/usr/lib/node_modules/npm/node_modules/node-gyp/lib/configure.js:336:16)
gyp ERR! stack     at emitTwo (events.js:126:13)
gyp ERR! stack     at ChildProcess.emit (events.js:214:7)
gyp ERR! stack     at Process.ChildProcess._handle.onexit (internal/child_process.js:198:12)
gyp ERR! System Linux 4.4.0-127-generic
gyp ERR! command "/usr/bin/node" "/usr/lib/node_modules/npm/node_modules/node-gyp/bin/node-gyp.js" "rebuild"
gyp ERR! cwd /root/meanTorrent/node_modules/iconv
gyp ERR! node -v v8.11.3
gyp ERR! node-gyp -v v3.6.2
gyp ERR! not ok
很明显的,还是出现了依赖缺失的情况,根据项目自身的介绍、 node-gyp 以及 lovell/sharp#1087 的相关提醒,安装libicu-dev、GCC编译库(主要是c++以及make这两个会被node-gyp调用)以及python-dev。然后重新安装依赖。
sudo apt-get install libicu-dev build-essential python-dev python-pip
npm install
使用 npm start 运行。过程中如果出现以下报错,说明bower以及相关浏览器端依赖没有正确安装(特别是在root账户下,这里直接使用新用户解决)。按照作者的建议是使用bower install --allow-root && bower prune --allow-root手动装一下。
rhilip@vultr:~/meanTorrent$ npm start

> [email protected] start /root/meanTorrent
> gulp

[08:54:34] Using gulpfile ~/meanTorrent/gulpfile.js
[08:54:34] Starting 'default'...
[08:54:34] Starting 'env:dev'...
[08:54:34] Finished 'env:dev' after 208 μs
[08:54:34] Starting 'copyLocalEnvConfig'...
[08:54:34] Starting 'makeUploadsDir'...
[08:54:34] Finished 'makeUploadsDir' after 835 μs
[08:54:34] Finished 'copyLocalEnvConfig' after 14 ms
[08:54:34] Starting 'lint'...
[08:54:34] Starting 'less'...
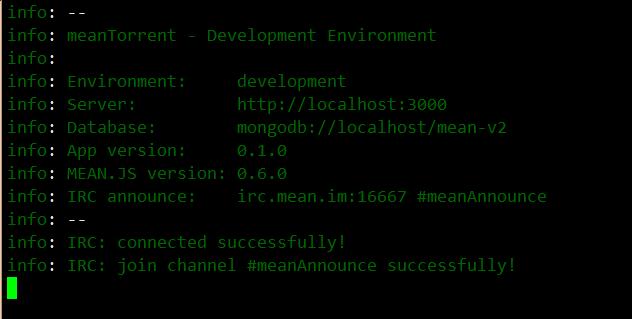
Potentially unhandled rejection [2] '../../../../public/lib/bootstrap/less/mixins/text-emphasis.less' wasn't found. Tried - /root/meanTorrent/public/lib/bootstrap/less/mixins/text-emphasis.less,../../../../public/lib/bootstrap/less/mixins/text-emphasis.less in file /root/meanTorrent/modules/core/client/less/mt-var.less line no. 4如果一切没有问题,那么在运行npm start后会提示一下信息:

Nginx反代以及开机自启
通过以上环节,我们已经把所有的软件都基本配置齐全了,并启用了meanTorrent的开发环境。但是默认监听在localhost而不是0.0.0.0上,同样这个程序会因为ssh的断开而终止。所以我们需要安装Nginx以配置反代,同时使用systemctl或者其他守护工具(如作者使用多个bashscript脚本以及forever进行管理,如果你要使用forever的话,请先全局安装npm i forever -g)使其能开机运行并崩溃重启。
安装Nginx也直接用包管理器吧,lnmp1.5也提供单Nginx安装方式,反正怎么方便怎么来就ok~
sudo apt-get install -y nginx-extras
vi /etc/nginx/sites-available/default
然后将默认的信息全部替换为以下常见反代配置(无SSL)
如果是在CloudFlare后,建议参照本人之前教程进行设置。(Cloudflare 下 Nginx 获取用户真实 IP 地址)
server {
    listen 80 default_server;
    listen [::]:80 default_server;

    server_name _;

    location / {
        proxy_pass          http://localhost:3000/;
        proxy_redirect      default;
        proxy_set_header    Accept-Encoding "";
        proxy_set_header    X-Real-IP       $remote_addr;
        proxy_set_header    X-Forwarded-For $proxy_add_x_forwarded_for;
    }

    location ~ /\.ht {
        deny all;
    }
}
然后重新载入Nginx配置信息并重启npm,你就可以直接使用 ip 或者域名 来进行访问了。
sudo systemctl reload nginx
npm start
先不进行注册,退出我们来先写个service文件来使用Systemd进行守护管理。sudo vi /etc/systemd/system/meantorrent.service。并填入以下内容:
[Unit]
Description=meanTorrent
Documentation=https://github.com/taobataoma/meanTorrent/wiki
After=network-online.target

[Service]
Type=forking
User=rhilip
Group=rhilip
UMask=007
Environment=NODE_ENV=production
WorkingDirectory=/home/rhilip/meanTorrent
ExecStart=/usr/bin/node server.js
Restart=always
RestartSec=10
StandardOutput=syslog
StandardError=syslog
SyslogIdentifier=meanTorrent

[Install]
WantedBy=multi-user.target
注意修改User、Group、WorkinDirectory为你自己的信息。
然后使用以下命令重载systemd配置以及实现开机启动等管理
sudo systemctl daemon-reload # 重载systemd配置
sudo systemctl start meantorrent  # 启动
sudo systemctl stop meantorrent  # 停止
sudo systemctl restart meantorrent  # 重启
sudo systemctl enable meantorrent  # 开机自动启动 (只需执行一次)
sudo systemctl disable meantorrent  # 取消开机启动
系统配置
个人建议这部分参考作者介绍 Getting Started With meanTorrent,对
config/env/torrent.js下文件进行配置修改。关于站点个性化设置,本处不再累述~
配置好邮件系统和Tracker Announce部分后,重启meanTorrent,然后注册账号即可。如果你只是和我一样测试,不对邮件系统进行配置,默认情况下注册后因为无法发送邮件导致账号状态为inactive 无法使用,需要进入mongo修改账户信息(其实我是默认config下进行账号注册的2333)。方法如下:
rhilip@vultr:~/meanTorrent$ mongo
> use mean-v2
switched to db mean-v2
> db.users.update({'username':'admin1234567'},{$set:{'status':'normal'}})
WriteResult({ "nMatched" : 1, "nUpserted" : 0, "nModified" : 1 })
那么,就完事了~


真好的文章。大神有时间搭建一下https://github.com/Empornium/Luminance吗?我弄了很多一直出问题。