Cloudflare下Nginx获取用户真实IP地址

Rhilip 2016-10-29 PM 7428℃ 0条

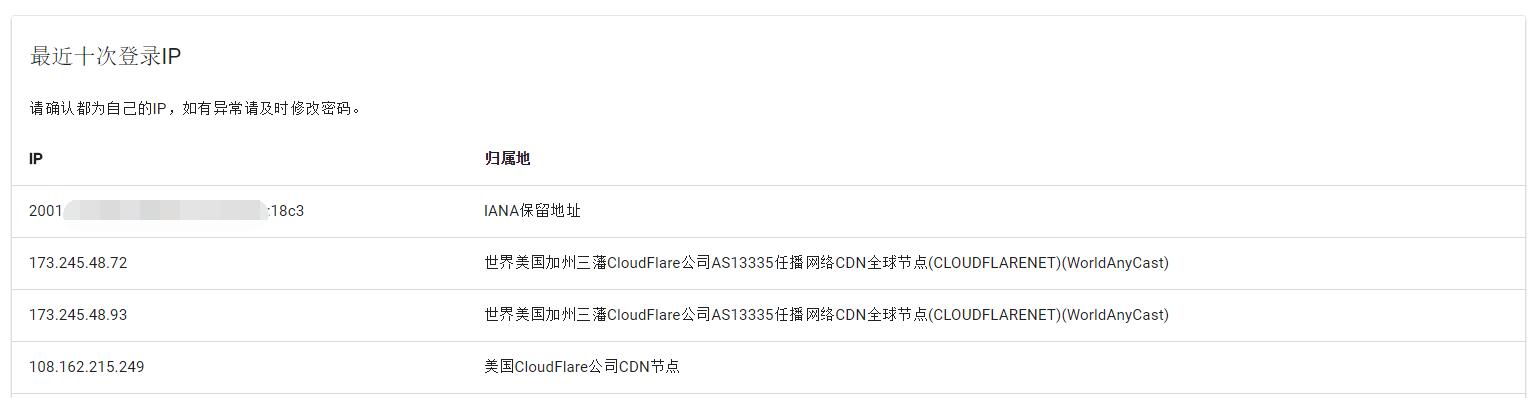
前段时间,本站开始上了Cloudflare的CDN服务,但是使用了一段时间后发现访问记录中记录的IP地址都变成了Cloudflare的节点地址。。。

这种情况肯定不好是吧╮(╯﹏╰)╭  (不能满足本人的好奇心嘛~

那就去解决它!


惯例性滴先Google了一下,发现了这篇文章

看起来挺简单的嘛,在nginx配置文件中加一段地址说明就好了的事。。
然而在重启时却发现,报错了。。。。。新添加的"set_real_ip_from"没有被认出来,导致新配置的文件不被认可就没能重启。。1.jpg


于是认真的看了下说明。

This module is not built by default, it should be enabled with the --with-http_realip_module configuration parameter.

原来如此嘛,是当初安装的时候没有安装所需要的模块呀~

那就开始在已经配置好的nginx上添加未编译安装模块吧。

使用lnmp.org 提供的一件包可以编辑lnmp.conf文件,添加nginx编译属性,然后使用upgrade.sh来无人值守升级避免下述问题。


1、看下编译安装nginx的时候,都编译安装的哪些模块。执行命令:" /usr/local/nginx/sbin/nginx -V ",得到一下信息

[root@WiseImpressionable-VM src]# /usr/local/nginx/sbin/nginx -V
nginx version: nginx/1.10.0
built by gcc 4.4.7 20120313 (Red Hat 4.4.7-17) (GCC)
built with OpenSSL 1.0.1e-fips 11 Feb 2013
TLS SNI support enabled
configure arguments: --user=www --group=www --prefix=/usr/local/nginx --with-http_stub_status_module --with-http_ssl_module --with-http_v2_module --with-http_gzip_static_module --with-ipv6 --with-http_sub_module

2、进入到nginx的安装目录,(这里吐槽下Virmach,果真是垃圾VPS提供商。母鸡的IPv6服务坏了快一个月都没能好)。我这里用的是当初我安装lnmp时候留下来的安装包。如果没有的话,可以用wget的方法从nginx官网上重新得到安装包。

cd /root/lnmp1.3-full/src
tar -xf nginx-1.10.0.tar.gz
cd nginx-1.10.0

3、重新./configure  ,添加所需要的模块后使用make编译。格式应该是这样的:"./configure " + 第一步得到的configure arguments信息 + 你想要添加的模块。

[root@WiseImpressionable-VM nginx-1.10.0]# ./configure   --user=www --group=www --prefix=/usr/local/nginx --with-http_stub_status_module --with-http_ssl_module --with-http_v2_module --with-http_gzip_static_module --with-ipv6 --with-http_sub_module --with-http_realip_module
[root@WiseImpressionable-VM nginx-1.10.0]# make

千万要注意:到这里就可以了,千万不要make install,不然文件就会被覆盖了。

4、备份原先配置,杀掉nginx进程,然后替换nginx二进制文件

[root@WiseImpressionable-VM nginx-1.10.0]# cp /usr/local/nginx/sbin/nginx /usr/local/nginx/sbin/nginx.bak
[root@WiseImpressionable-VM nginx-1.10.0]# killall nginx
[root@WiseImpressionable-VM nginx-1.10.0]# killall nginx
nginx: no process killed
[root@WiseImpressionable-VM nginx-1.10.0]# cp ./objs/nginx /usr/local/nginx/sbin/
cp: overwrite `/usr/local/nginx/sbin/nginx'? yes

5、更改站点的nginx配置文件,在location / {} 中加入第一篇文章中提到的信息

location / {
 set_real_ip_from 103.21.244.0/22;
 set_real_ip_from 103.22.200.0/22;
 set_real_ip_from 103.31.4.0/22;
 set_real_ip_from 104.16.0.0/12;
 set_real_ip_from 108.162.192.0/18;
 set_real_ip_from 131.0.72.0/22;
 set_real_ip_from 141.101.64.0/18;
 set_real_ip_from 162.158.0.0/15;
 set_real_ip_from 172.64.0.0/13;
 set_real_ip_from 173.245.48.0/20;
 set_real_ip_from 188.114.96.0/20;
 set_real_ip_from 190.93.240.0/20;
 set_real_ip_from 197.234.240.0/22;
 set_real_ip_from 198.41.128.0/17;
 set_real_ip_from 199.27.128.0/21;
 set_real_ip_from 2400:cb00::/32;
 set_real_ip_from 2606:4700::/32;
 set_real_ip_from 2803:f800::/32;
 set_real_ip_from 2405:b500::/32;
 set_real_ip_from 2405:8100::/32;
 set_real_ip_from 2c0f:f248::/32;
 set_real_ip_from 2a06:98c0::/29;

 # use any of the following two
 real_ip_header CF-Connecting-IP;
 #real_ip_header X-Forwarded-For;
 }

6、重启nginx服务
lnmp nginx restart
我这里用的是lnmp带的命令,你还可以使用下面的命令来重启并检查nginx运行情况

[root@WiseImpressionable-VM nginx-1.10.0]# /usr/local/nginx/sbin/nginx
[root@WiseImpressionable-VM nginx-1.10.0]# netstat -anpt | grep nginx
tcp 0 0 0.0.0.0:80 0.0.0.0:* LISTEN 23371/nginx

2018.01.01 更

7、自动更新 cloudflare-real-ip 清单
如果你是使用lnmp.org提供的一键包来安装的,请参照进行。

  1. 在nginx配置目录创建cloudflare_ip.conf文件
    touch /usr/local/nginx/conf/cloudflare_ip.conf
  2. 修改原有的vhost配置,将原来第五步配置的信息改为
    include cloudflare_ip.conf;
  3. 创建自更新脚本update_cloudflare_ip.sh(假定该文件放在 /root 目录下),内容如下:
#!/bin/bash
echo "#Cloudflare" > /usr/local/nginx/conf/cloudflare_ip.conf;
for i in `curl https://www.cloudflare.com/ips-v4`; do
        echo "set_real_ip_from $i;" >> /usr/local/nginx/conf/cloudflare_ip.conf;
done
for i in `curl https://www.cloudflare.com/ips-v6`; do
        echo "set_real_ip_from $i;" >> /usr/local/nginx/conf/cloudflare_ip.conf;
done

echo "" >> /usr/local/nginx/conf/cloudflare_ip.conf;
echo "# use any of the following two" >> /usr/local/nginx/conf/cloudflare_ip.conf;
echo "real_ip_header CF-Connecting-IP;" >> /usr/local/nginx/conf/cloudflare_ip.conf;
echo "#real_ip_header X-Forwarded-For;" >> /usr/local/nginx/conf/cloudflare_ip.conf;

配置crontab
0 5 * * 1 /bin/bash /root/update_cloudflare_ip.sh

↑ 每周一的上午5点更新


实验后效果


标签: 反代, LNMP, VPS

非特殊说明,本博所有文章均为博主原创。

评论啦~